Recent Post

Sunday, 13 October 2024


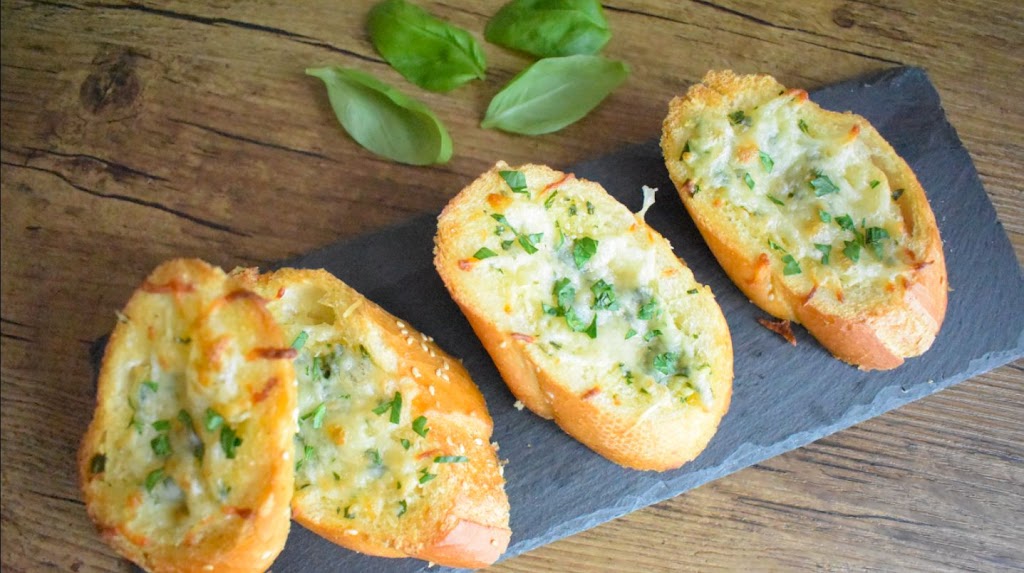
Easy Garlic bread recipe one of the best appetize i love especially when i make grilled chicken, or and BBQ. I tried many ways and this way is the best. What to use instead parsley?
You can use fresh thyme or dried instead of parsley.
How much time it takes to prepare this recipe?
It is fast and easy, it takes only 5 minutes or less to prepare it.
should i garnish with cheese?
Sometimes i made this recipe without cheese, but i assure you that the taste with cheese is better and more tasty than the regular one.

What ingredients you’ll need to make Garlic bread recipe?

  • Baguette bread
  • Butter
  • Parsley
  • garlic
  • parmesan cheese
  • Mozzarella cheese(optional)

How to make garlic bread?

  • Cut The baguette into 3 cm thick slices.
  • To the melted butter add the garlic and parsley.
  • Grease bread from the tow sides with butter garlic mixture.
  • Place bread slices in a baking tray, top the bread with parmesan and mozarella cheese.
  • Toast in a hot oven at 180°C/365F for 15 minutes or until the sides are golden.

How much time it takes to grill the bread?

It only took 15 minutes to grill the garlic bread in my oven at 180°c/356F. And if you make a BBQ on the coal it takes a couple of minutes or keep an eye on it until golden and crispy.

What if you feel 3 cloves of garlic is too much for this recipe?

It calls garlic bread and the garlic is one of the main ingredients in this recipe, but if you feel you dislike much of garlic add 1 to 2 cloves of garlic, but the garlic burn is not appears because the garlic is somehow grilled.


Ingredients
  

  • 1 Baguette bread
  • 60 grams melted butter
  • 3 cloves of garlic
  • 1 Tbsp finely chopped parsley
  • 2 Tbsp parmesan cheese 
  • 2 Tbsp mozzarella cheese 

Instructions
 

  • cut The baguette into 3 cm thick slices.
  • To the melted butter add the garlic and parsley.
  • Grease bread from the tow sides with butter garlic mixture.
  • Place bread slices in a baking tray, top the bread with parmesan and mozarella cheese.
  • Toast in a hot oven at 180°C/365F for 15 minutes or until the sides are golden

Notes

The way:
  1. cut The baguette into 3 cm thick slices.
  2. To the melted butter add the garlic and parsley.
  3. Grease bread from the tow sides with butter garlic mixture.
  4. Place bread slices in a baking tray, top the bread with parmesan and mozarella cheese.
  5. Toast in a hot oven at 180°C/365F for 15 minutes or until the sides are golden.
  6. Enjoy!
0

Wednesday, 2 October 2024


Looking for easy breakfast or dessert?

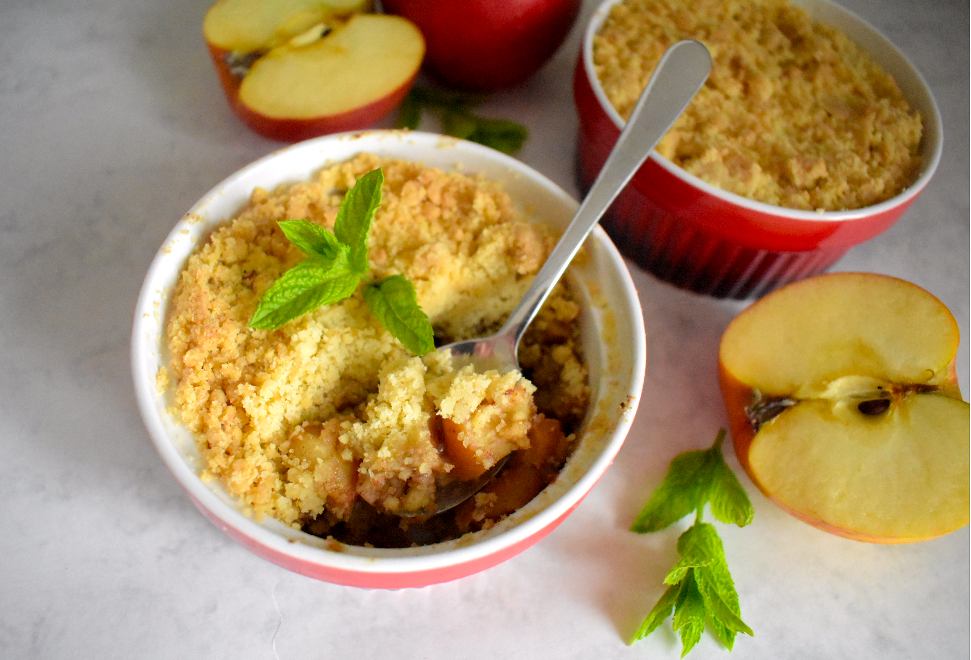
This Easy 5 Minutes Apple crumble is great as breakfast and as a dessert , as well the apple pie filling inside gives a very delicious taste and the crunchiness of the top crumble is perfect just serve it with vanilla ice cream and it would be the perfect dessert ever.

It is very easy and you can prepare it in minutes, just cut the apples, mix butter with flour and place it in a ramekins bake and you have it ready by hands, and don’t forget that this recipe is rich in vitamins we know that apples are one of the most important fruits that we must eat in our days.

Why you have to try this recipe?

well, The ingredients for this recipe are available in every home, easy to make and all family members love it. Let me know your opinion about it, by leaving a comment under this recipe or send me a message on my facebook page.

What ingredients you’ll need to prepare Apple crumble? (Full recipe below)

  • Flour
  • Butter
  • Apple
  • Sugar
  • ground cinnamon

How to make 5 Minutes Apple Crumble?

  • Preheat the oven to 200°C/380F.
  • Toss 300g peeled, cored and sliced Bramley apples with sugar, ground cinnamon and flour. put in a 2 raimken, flatten down with your hand
  • Slice in cold butter, flour, baking powder and sugar and rub it in with your fingertips until the mixture looks like moist breadcrumbs. Shake the bowl and any big bits will come to the surface – rub them in.
  • Pour the crumb mix over the apples then use a fork to even out.
  • Set on a baking tray and put in the preheated oven for 30-35 minutes, until the top is golden.
  • Leave to cool for 10 minutes before serving.


5 Minutes Apple Crumble

Ingredients

For filling:

  • 2 medium apples 300 grams
  • ½ tbsp all porpuse flour
  • ½ tbsp sugar
  • ½ tsp grounded cinnamon

Crumble layer:

  • 1 cup all purpose flour
  • ½ tsp baking powder
  • 60 grams butter
  • 3 tbsp sugar 35 grams
  • 1 tsp Vanilla extract

Instructions

  1. Preheat the oven to 200°C/380F.
  2. Toss 300g peeled, cored and sliced Bramley apples with sugar, ground cinnamon and flour. put in a 2 raimken, flatten down with your hand.
  3. Slice in cold butter, flour, baking powder and sugar and rub it in with your fingertips until the mixture looks like moist breadcrumbs. Shake the bowl and any big bits will come to the surface – rub them in.
  4. Pour the crumb mix over the apples then use a fork to even out.
  5. Set on a baking tray and put in the preheated oven for 30-35 minutes, until the top is golden. Leave to cool for 10 minutes before serving.
  6. Enjoy!

0

Wednesday, 20 September 2023


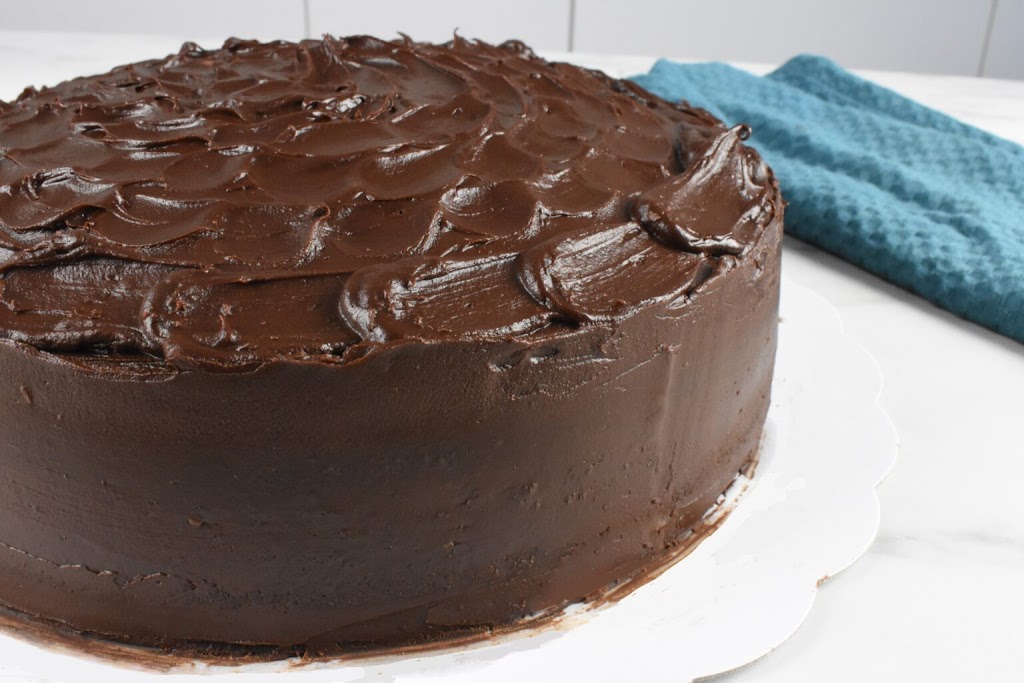
This quick and easy chocolate cake is perfect for any occasion. Some sweets go above and beyond the norm, escorting our taste receptors on a voyage of pure bliss. A confectioner’s dream come true, it is a symphony of tastes and textures that will leave you craving more. But what really sets this dessert apart is the rich chocolate ganache that decorates it. This isn’t just ganache. It is a silky smooth masterpiece that exudes luxury with every bite. Ganache strikes a delicate balance between sweetness and the deep, sweet appeal of fine chocolate. As it coats and flows down the sides, you’ll find it impossible to resist and will ask for more.

This Chocolate Ganache Cake isn’t just dessert; it’s an experience. It’s a celebration of life’s sweetest moments, an invitation to savor the richness of the here and now. Whether you’re sharing it with loved ones on a special occasion or sneaking a quiet slice just for yourself, this cake embodies chocolate cake perfection.

Why is this chocolate cake quick and easy?

If you are in a hurry and want a cake for a birthday or for a party, this cake will make you happy, as it is easy and quick and does not require any effort from you. Just mix all the ingredients in your one electric mixer bowl or stand mixer without using any other equipment; just add the ingredients as mentioned and baked it for a fluffy and delicious chocolate cake.

Tips for a successful Chocolate Cake :

  • Make sure your eggs are at room temperature. Cold eggs can result in an uneven batter and a less airy cake.
  • Be careful not to overmix when adding the dry ingredients into the egg mixture. Overmixing can cause the cake to be dense rather than airy.
  • Allow the cakes to cool completely before attempting to frost or fill them. Warm cakes can cause fillings and frostings to melt and become runny.
    With a little practice and attention to detail, you’ll be able to consistently create light and spongy cakes that are sure to impress your family and friends. Happy baking!


Best Chocolate Cake

Yield: 12 pieces
 
Prep Time: 30 minutes
 
Cook Time: 45 minutes
 
Total Time: 1 hour 15 minutes

Ingredients

  • 5 Eggs
  • 1 teaspoon vanilla extract
  • 1 ¼ cups sugar
  • ¾ cup milk
  • ½ cup vegetable oil
  • 2 ¼ cups all purpose flour
  • 1 Tablespoon Baking powder
  • ¼ cup Cacao powder

For ganache

  • 200g dark chocolate
  • ½ cup heavy cream

Instructions

  1. Preheat your oven to 350°F (175°C). Grease and line the bottom of cake pan with parchment paper.
  2. In a medium-sized bowl, sift together the all-purpose flour, baking powder, cacao powder and salt.
  3. Using an electric mixer or stand mixer, beat the eggs with the vanilla extract on high speed, gradually add in the granulated sugar while continuing to beat, until they're light.
  4. Add milk and vegetable oil, and give them a quick mix.
  5. Add the sifted dry ingredients into two phases to the egg and sugar mixture. Don't over mix when the dry ingredients disappears in the mixture, stop whisking.
  6. Pour the Batter to the prepared cake pan. Gently tap the pan on the counter to remove any air bubbles.
  7. Bake in the preheated oven for approximately 45 minutes, or until a toothpick inserted into the center comes out clean.
  8. Once the cake are done, remove from the oven and let it cool for about 5 minutes. Then, carefully invert the cakes onto a wire rack to cool completely.
  9. Make the Chocolate Ganache: In a saucepan, heat the heavy cream over medium-high heat until it begins to simmer. Do not let it come to a boil.
    Place the chocolate chips in a bowl.
  10. Pour the hot cream over the chocolate chips and let it sit for a minute to melt the chocolate.
  11. Stir the mixture until the chocolate is completely melted and the ganache is smooth and glossy.
  12. Allow the ganache to cool to room temperature.
  13. Once the cakes have cooled completely, pour a generous amount of the cooled ganache over the top of the cake, allowing it to drip down the sides.
  14. Use a spatula to spread the ganache over the sides of the cake, covering it completely.
  15. You can decorate the cake as desired.
  16. Allow the ganache to set at room temperature for a couple of hours or in the refrigerator for faster setting.

Your chocolate ganache cake is now ready to be enjoyed! Slice it and serve it to your family and friends for a delicious treat.

0

Saturday, 9 September 2023


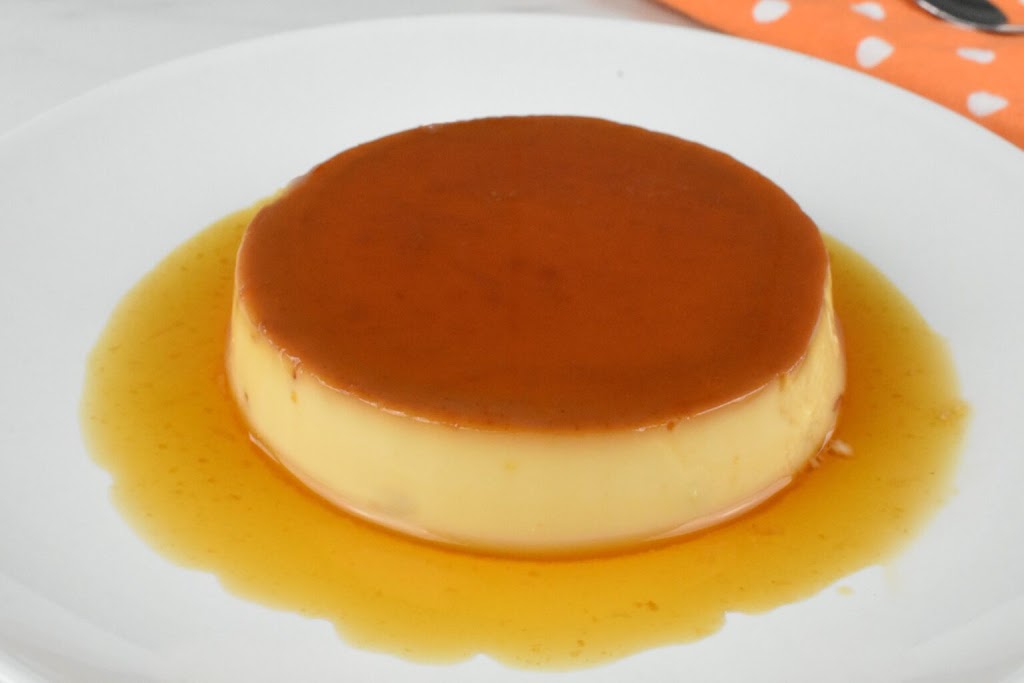
Indulge in the elegance of our irresistible The ultimate Leche Flan recipe.

This exquisite dessert is a symphony of flavors and textures that will enchant your taste buds and leave you craving for more. As your fork delicately glides through the velvety custard, it releases a cascade of luscious caramel that dances on your palate, a perfect marriage of silky sweetness and a gentle hint of vanilla. Each spoonful is a journey into pure bliss, the creamy custard so tender it practically melts in your mouth. Our Leche Flan is the embodiment of sophistication, a dessert that effortlessly captivates both the eye and the senses. With its shimmering amber caramel crown, it’s not just a treat for your taste buds but a feast for the eyes as well. Experience the magic of this time-honored classic, a dessert that promises to transform any occasion into an unforgettable celebration of flavor and luxury.

Tips to make a perfect ultimate Leche Flan recipe:

  • When making the caramel, ensure it reaches a beautiful amber color without burning. Stir gently and consistently to avoid crystallization.
  • Prepare your mold or ramekins by coating them with caramel evenly. Allow the caramel to harden before pouring the custard mixture.
  • After mixing the eggs and milk, strain the mixture through a fine sieve to remove any impurities. This will result in a smoother flan.
  • To prevent air bubbles in your flan, remove the foam after strain with a tablespoon before baking.
  • Use a water bath (bain-marie) to bake the flan. This gentle cooking method ensures even heat distribution and prevents the custard from curdling.
  • Bake the flan at a low temperature (around 325°F or 160°C) for a longer time to achieve a silky-smooth texture. It should be set but still slightly jiggly in the center when done.
  • Cover the mold or ramekins with aluminum foil to prevent water from seeping into the flan during baking.
  • Allow the Leche Flan to cool at room temperature before refrigerating it. This gradual cooling helps prevent cracks on the surface.
  • Refrigerate the flan for several hours or overnight to allow it to fully set and develop its flavors. A well-chilled flan is firmer and more enjoyable.

Present your Leche Flan with pride and style. It’s not just a dessert; it’s a work of art to be admired before it’s savored.

By following these tips, you’ll create the ultimate Leche Flan that’s not only visually stunning but also incredibly delicious, with a velvety texture that melts in your mouth.


The ultimate Leche Flan

Yield: 3
 
Prep Time: 15 minutes
 
Cook Time: 40 minutes
 
Total Time: 55 minutes

Ingredients

  • 1 cup granulated sugar
  • 3 tablespoons water
  • 3 eggs
  • 1 egg yolk
  • 1 and 1/2 cup milk
  • 1 teaspoon vanilla extract
  • Pinch of salt

Instructions

  1. Preheat your oven to 325°F (160°C).
  2. Start by making the caramel sauce: Place ½ cup of granulated sugar with 1 tablespoon of water in a saucepan over medium low heat. Stir continuously until the sugar melts and turns into a golden brown caramel, add the remain 2 tablespoon of water carfully. Then remove from heat.
    Immediately pour it into the bottom of your flan mold or ramekins. Let it cool and harden while you prepare the custard.
  3. Heat the milk on a medium heat.
  4. In a medium bowl, add the 3 eggs, 1 egg yolk, the remain ½ cup of sugar and vanilla extract and beat them lightly with a whisk.
  5. Add the hot milk to the beaten eggs and mix until well combined.
  6. Strain the flan mixture in a measuring cup with a strainer.
  7. Pour the mixture over the hardened caramel in the mold or ramekins.
  8. Cover the mold or ramekins with aluminum foil.
  9. Place the covered mold or ramekins in a larger baking dish. Fill the larger dish with hot water until it reaches about halfway up the sides of the mold or ramekins. This water bath helps ensure even cooking.
  10. Carefully transfer the baking dish to the preheated oven and bake for 40-50 minutes. The custard should be set but still slightly jiggly in the center when gently shaken, or You can insert a toothpick in the middle of the flan and if it comes out clean then it is ready.
  11. Remove from the oven and let it cool on a wire rack at room temperature.
  12. Once cooled, refrigerate the flan for at least 2 hours or overnight to allow it to fully set and chill.
  13. To serve, run a knife around the edges of the mold or ramekins to loosen the flan. Place a serving plate over the top and invert it to release the dessert. The caramel will flow over the custard, creating a delicious sauce.
Enjoy!
0

Saturday, 2 September 2023


 This is so simple and delicious recipe for easy Shrimp Stir Fry Noodles. The star of the show, of course, is the noodles. Soft yet resilient, they effortlessly absorb the sauce, infusing every strand with a burst of flavor. These noodles are like a comforting hug for your taste buds, providing the perfect canvas for the bold flavors of the stir-fry. One of my favorite dishes is noodles and the three most important sauces that a delicious noodle should have to give the best flavor are the Chinese sauces, such as oyster sauce or soy sauce and sesame oil.

What makes my Shrimp Stir-Fry Noodles truly special is the harmonious blend of flavors that dance on your palate with every bite. The succulent shrimp, cooked to perfection, soak up the savory, rich stir-fry sauce, while the crisp and colorful vegetables add a delightful crunch. Together, they create a symphony of tastes that’s nothing short of irresistible.

How to make the perfect Easy Shrimp Stir fry noodles?

Full recipe below, but following these instruction give you the best Noodles:

  • Make sure you have all the ingredients ready before you start cooking. This includes the shrimp, vegetables, noodles, and the stir-fry sauce components.
    Peel and devein the shrimp if they aren’t already prepared. Pat them dry with a paper towel to remove excess moisture, which helps with browning.
  • Follow the instructions on the package to cook the noodles. Overcooking can make them mushy, so be careful not to cook them too long. Rinse with cold water to stop the cooking process and prevent sticking.
  • Use a large skillet or wok and heat it over medium-high heat. This allows for quick and even cooking.
  • Add a tablespoon of vegetable oil to the hot pan. Quickly stir-fry the shrimp until they turn pink and opaque, usually 1-2 minutes per side. Remove them from the pan and set them aside.
  • In the same pan, add another tablespoon of vegetable oil. Add minced garlic and sauté briefly until fragrant. Then, add your favourit vegetables. Stir-fry for 2-3 minutes or until the vegetables are slightly tender.
  • Return the cooked shrimp and drained noodles to the pan with the sautéed vegetables.
  • Pour the prepared stir-fry sauce over the mixture in the pan. Stir everything together to ensure the sauce evenly coats the noodles, shrimp, and vegetables.
  • Cook for an additional 2-3 minutes, or until everything is heated through. This allows the flavors to meld.
  • Garnish If desired, sprinkle with sesame seeds and chopped cilantro for a burst of flavor and visual appeal.
  • Taste your stir fry and adjust the seasoning if needed. You can add more soy sauce for saltiness or a touch of sweetness if you prefer.
  • Shrimp stir-fry noodles are best enjoyed hot and fresh from the pan.

Following these steps should help you create a delicious and successful Shrimp Stir Fry Noodles dish. Enjoy your meal!

Shrimp Stir fry Noodles

Yield: 2
 
Prep Time: 5 minutes
 
Cook Time: 10 minutes
 
Total Time: 15 minutes

Ingredients

For the stir fry sauce:

  • 2 tablespoons soy sauce
  • 1 tablespoon oyster sauce
  • 2 tablespoons water
  • 1 tablespoon sesame oil
  • 1 tablespoon rice vinegar
  • 1 teaspoon brown sugar
  • 1/4 Teaspoon ginger

For the stir fry:

  • 200g egg or rice noodles or any you have
  • (300g) large shrimp, peeled and deveined
  • 2 tablespoons vegetable oil
  • 3 cloves garlic, minced
  • 1 red bell pepper, diced
  • 1 cup Leek, sliced
  • 1 cup white cabbage, sliced
  • 1 cup Soy mung beans

Instructions

    1. In a measuring cup, whisk together the soy sauce, oyster sauce, water, sesame oil, rice vinegar, brown sugar, and ginger. Set aside.
    2. Cook the noodles according to the package instructions. Drain, rinse with cold water to prevent sticking, and set aside.
    3. In a large skillet or wok, heat 1 tablespoon of vegetable oil over medium-high heat. Add the shrimp and 1 minced clove of garlic, stir-fry for 2-3 minutes, until the shrimp cooked. Remove the shrimp from the skillet and set aside.
    4. In the same skillet, add the remaining 1 tablespoon of vegetable oil. Add the minced garlic, and sauté for about 30 seconds until fragrant. Add the sliced red bell pepper, leek, cabbage and Soy mung beans. Stir-fry for 2-3 minutes until the vegetables are slightly tender.
    5. Add the cooked noodles and cooked shrimp back to the skillet over the vegetables. Pour the prepared stir fry sauce over the mixture.
    6. Toss everything together using tongs or spatulas, ensuring that the sauce is evenly distributed and coats the noodles and shrimp. Cook for an additional 2-3 minutes until everything is heated through.
    7. Divide the shrimp stir-fry noodles among plates or bowls and serve immediately.
    8. Feel free to customize this recipe by adding your favorite vegetables or adjusting the level of spiciness with chili sauce or red pepper flakes.
    9. Enjoy your delicious homemade Shrimp Stir Fry Noodles!
0

Wednesday, 30 August 2023


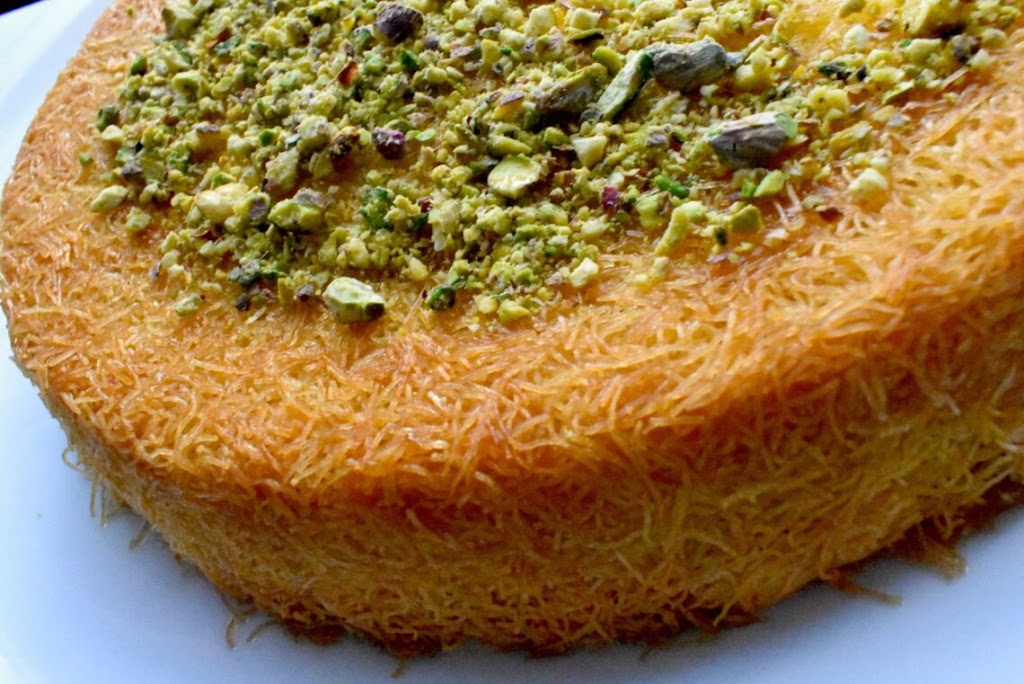
This incredible and the ultimate Kunafa recipe, a delicious and traditional Middle Eastern dessert that you’ll keep make it over and over. Kunafa is one of my favorite desserts, especially during holidays and celebrations. You may think that the recipe is difficult, but it is one of the easiest dessert. Just follow my instructions and you will get the best Kunafa recipe.

Step into a world where every bite is an experience – where exciting combinations of flavors and textures dance to your taste buds. Imagine that dessert is not just fun, but a journey of flavours, a symphony of indulgence. This is exactly what our luxuriously creamy Kunafa offers – a sensory adventure that will leave you craving for more. The taste will take you to the Arabian warm nights, where you’ll find your ral pleasure.

Imagine a golden-brown masterpiece, crisp and delicate, concealing a velvety secret within. As you take your first bite, the outer layers gently yield, unveiling the treasure concealed beneath – clotted cream, known as (qishtah) in Arabic. This traditional delight takes you on a journey back in time, to the heart of Middle Eastern flavors, where rich heritage meets modern indulgence.

Kunafa is not just a dessert; It is an experience, a moment of absolute culinary ecstasy. Whether you enjoy it on a lazy afternoon, share it with loved ones after a meal, or serve it as the piece de resistance at a gathering, this clotted cream-filled kunafa promises to be the star of the show.

Did I mention that Kunafa can be filled with cheese, cream, or any kind of nuts such as pistachios or walnuts? That’s why kunafa is easy to make and special dessert, you can fill it as a desire, some people filled it with mango and even Nutella!

Where do you find the kunafa dough to prepare the ultimate kunafa?

Kunafa dough can be made at home or you can buy it from any store that sells Arabic products, just ask for the shreded phyllo dough or Kunafa dough and they will tell you where to find it!


The ultimate Kunafa

Yield: 8 peceis
 
Prep Time: 30 minutes
 
Cook Time: 40 minutes
 
Total Time: 1 hour 10 minutes

Ingredients

For the kunafa:

  • 400g kunafa dough (shredded phyllo dough)
  • 1/2 cup unsalted butter, melted
  • 1/4 cup powdered sugar

For the filling:

  • 1 cup heavy cream
  • 1 cup milk
  • 1 Tablespoon Cornstarch
  • 1 Tablespoon sugar
  • 3 Toast

For the sugar syrup:

  • 2 cups granulated sugar
  • 1 cup water
  • 1 teaspoon lemon juice
  • Optional: 1 teaspoon of orange blossom water or rose water

Instructions

1. Prepare the Sugar Syrup:

  • In a saucepan, combine sugar, water, and lemon juice.
  • Bring the mixture to a boil, then reduce the heat and let it simmer for about 10-15 minutes, until it thickens slightly.
  • Add the orange blossom water or rose water if using, then remove from heat. Allow the syrup to cool while you prepare the rest of the dessert.

2. Prepare the Filling:

  • Cut the toast into cubes.
  • In a saucepan, pour the milk, cream, sugar and cornstarch. Stir the mixture over medium heat, then add the bread cubes.
  • Continue stirring, and use a hand whisk to smooth the pudding, bring it to simmer. Remove from heat and allow to cool.

3. Assemble the Kunafa:

  • Preheat your oven to 365°F (180°C).
  • In a large bowl cut the kunafa dough into 1 inch slices, drizzle the melted butter over the kunafa dough with the powdered sugar. Mix all together with your hands.
  • Take half of the shredded kunafa dough and spread it in a greased 23 cm round baking pan. Press it down gently with a cup to create an even layer.
  • Spread the clotted cream filling mixture over the dough.
    Cover the filling with the remaining half of the kunafa dough, pressing it down gently.


4. Bake kunafa in the preheated oven for about 30-40 minutes or until the kunafa turns golden brown and crispy on top.

5. Once the kunafa is out of the oven, flip it carefully in a serving dish. Pour the cooled sugar syrup over the hot kunafa. Be sure to evenly distribute the syrup. Allow the kunafa to rest for about 10-15 minutes to soak up the syrup.

Optional: sprinkle chopped pistachios on top of the kunafa for added flavor and decoration.


0